Archive for the ‘browser’ Category

No Comments

Adding HTML from a string the safe way

Friday, April 14th, 2023

Adding HTML from a string isn’t difficult. Something like this works amazingly:

name="John"
html = `<div>Hello <b>${name}</b>,
<p>Welcome on this lovely day</p>
</div>`
document.body.innerHTML=html;

It’s easy and it’s fast, but it is not safe!

Copy and paste above code in your browser console and execute it. It will remove all content, and show the new html.

Let’s assume you get the name from an external resource or user input, instead of John it could be something like `<img src=”z” onerror=”alert(‘Your f*cked’)”`

name=`<img src="z" onerror="alert('Your f*cked')"`
html = `<div>Hello <b>${name}</b>,
<p>Welcome on this lovely day</p>
</div>`
document.body.innerHTML=html;

Copy and paste above code in your browser console and execute it.

It will execute the JavaScript code in the onerror attribute and show an alert. This demo is harmless, but innerHTML is a security hole, that opens the way to severe security risks.

innerHTML is not safe!

But help is on the way, a setHTML function, that can be tweaked by a sanitizer function.

How to use the new and secure way of adding HTML from a string

The syntax for the new function is

setHTML(input, options)

So this will work:

name=`<img src="z" onerror="alert('Your f*cked')"`
html = `<div>Hello <b>${name}</b>,
<p>Welcome on this lovely day</p>
</div>`
document.body.setHTML(html);

Keep in mind innerHTML is a property, and setHTML is an function.

setHTML is working in Chromium and Firefox, although in Firefox it’s behind a config setting. AFAIK it’s still considered experimental. To change it open about:config and toggle the preference to tru

dom.security.setHTML.enabled

Can’t wait until this is shipped as stable.

Somehow the documentation is wrong, it’s not the dom.security.sanitizer.enabled preference , but the `dom.security.setHTML.enabled` that should bet toggled.

The sanitizer preference is for the new Sanitizer() object that can be passed as an option

const attribute_sanitizer =new Sanitizer ( {allowAttributes: {"style": ["div"]}})
document.body.setHTML(unsanitized_string,{sanitizer: attribute_sanitizer}) 

That way you can tweak the elements that you want to be sanitized. Like dropping specified elements, attributes, or comments. Also very useful.

But the default is working fine in Firefox.

No Comments

Install separate Firefox (Beta) Snap on Ubuntu 22.04

Wednesday, August 3rd, 2022

To try out a beta version of Firefox snap, you have to enable the experimental – read developer options – of parallel instances install of snap.

sudo snap set system experimental.parallel-instances=true

Them you can install a beta version of Firefox next to the stable version

sudo snap install --beta firefox_beta

But that doesn’t work, you will probably get some error/warning message like this:

error: cannot perform the following tasks:
- Set automatic aliases for snap "firefox_beta" (cannot enable alias "geckodriver" for "firefox_beta", already enabled for "firefox")

As it seems you’ll need to add  --unaliased when installing firefox_beta

sudo snap install --beta --unaliased firefox_beta

See the snap forum thread

That does work.

How to install Firefox Beta snap parallel to Firefox

sudo snap install --beta --unaliased firefox_beta
firefox_beta (beta) 104.0b5-1 from Mozilla✓ installed

To my surprise it copied the profile directory, I had all the same extensions and bookmarks installed and available.

Different profile directories

Firefox stable profiles path:

~/snap/firefox/common/.mozilla/firefox/…

Firefox Beta profiles path:

~/snap/firefox_beta/common/.mozilla/firefox/…

No Comments

Debugging Firefox and `hidden` features of the browser: the about pages

Monday, August 1st, 2022

Here is a list of all about: pages of Firefox Desktop.

Especially the about:telemetry page is interesting, I always try to disable any telemetry whatsoever, but this pages show exactly what your sharing. Too much in my opinion, especially the list of all activated extension. That’s a kind of digital fingerprinting.

Firefox Desktop about: pages

Also the networking tab is interesting for debugging. Robots is an Easter-egg.

And here is the list of al about pages for Firefox Android Mobile

Firefox Mobile Android about: pages

No Comments

Raspberry Pie with a Taste of Chocolate, the funny Desktop Droste effect

Tuesday, June 28th, 2022

The original Droste Effect

Trying out the new Ubuntu 22.04 on my Raspberry Pi 400, I was surprised by the smoothness of the new Ubuntu distribution. Much better impression then the first time I tried Ubuntu on the RPI, I think that was the 20.10 release.

A funny thing to try out, especially if you love fractals or you are an admirer of the Dutch graphic artist Escher who’s work features features mathematical and even impossible objects, is the subject of this post.

Another returning phenomenon in his drawings and paintings is the Droste-effect , and I’ll shwo you how to create a Droste effect on your Raspberry Pi with a few mouse-clicks.

Creating a Droste effect on your Raspberry Pi

Yes, you can do that with just a couple of mouse-clicks, you don’t need a mathematical package or a graphical editor like Gimp or so.

Trying out the new Gnome Desktop Sharing feature, which let you share your desktop not only with the older VNC protocol, but also with the newer RDP protocol, gave me this idea.

To activate:

Settings -> sharing -> enable -> enable Remote Desktop -> and setup some authentication: username and password

For creating the Droste-effect we gonna do something silly: we gonna connect to our-self! Yes a Remote Desktop Connection with a local client.

A Remote Desktop Connection with a local client

Introspection!

Start up the default remote desktop client Remmina.

Quick setup a new connection, enter your IP-address and the authentication you just entered: username and password.

To find your IP-address, open a terminal, (CTRL ALT T) and type `ip address` return. Then you will find it in the output, or look it up under details in the network settings.

Save and connect in the Remmina dialog, and see the connection being made.

Click the `Toggle Scaled Mode` button to rescale the desktop (CTRL_R S), and there it is.

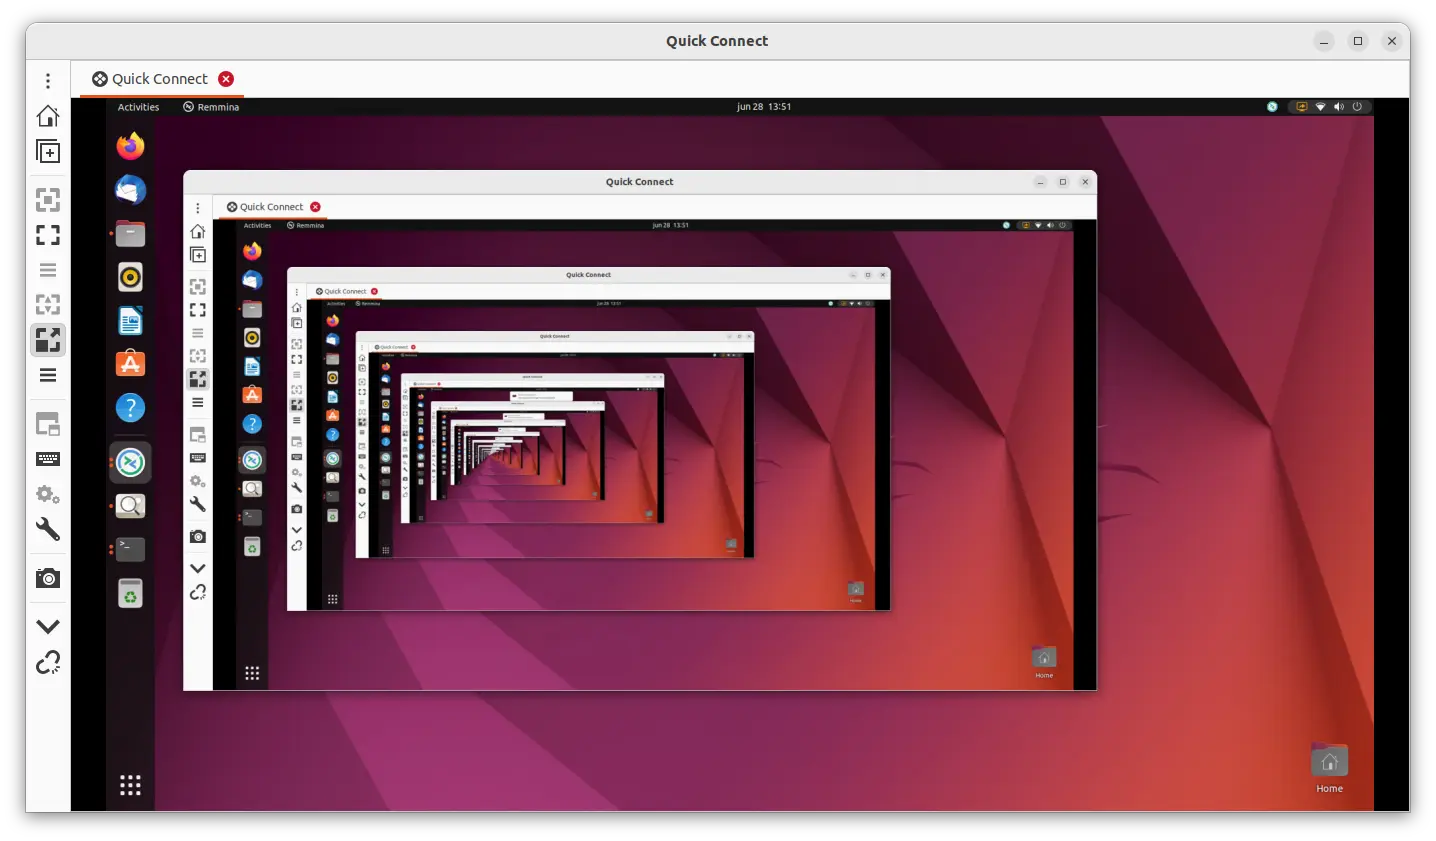
A nice Raspberry Pi Droste Effect of the Ubuntu Desktop in a local remote Desktop connection: 🙂

Remmina Droste effect

Remmina Droste effect

Gnome-connections

An alternative to `Remmina` is Gnome-connections. That program is in development, but like all Gnome apps, it does offer an very easy and intuitive approach.

Can all the settings in Remmina be overwhelming, gnome-connections is easy as it can be.

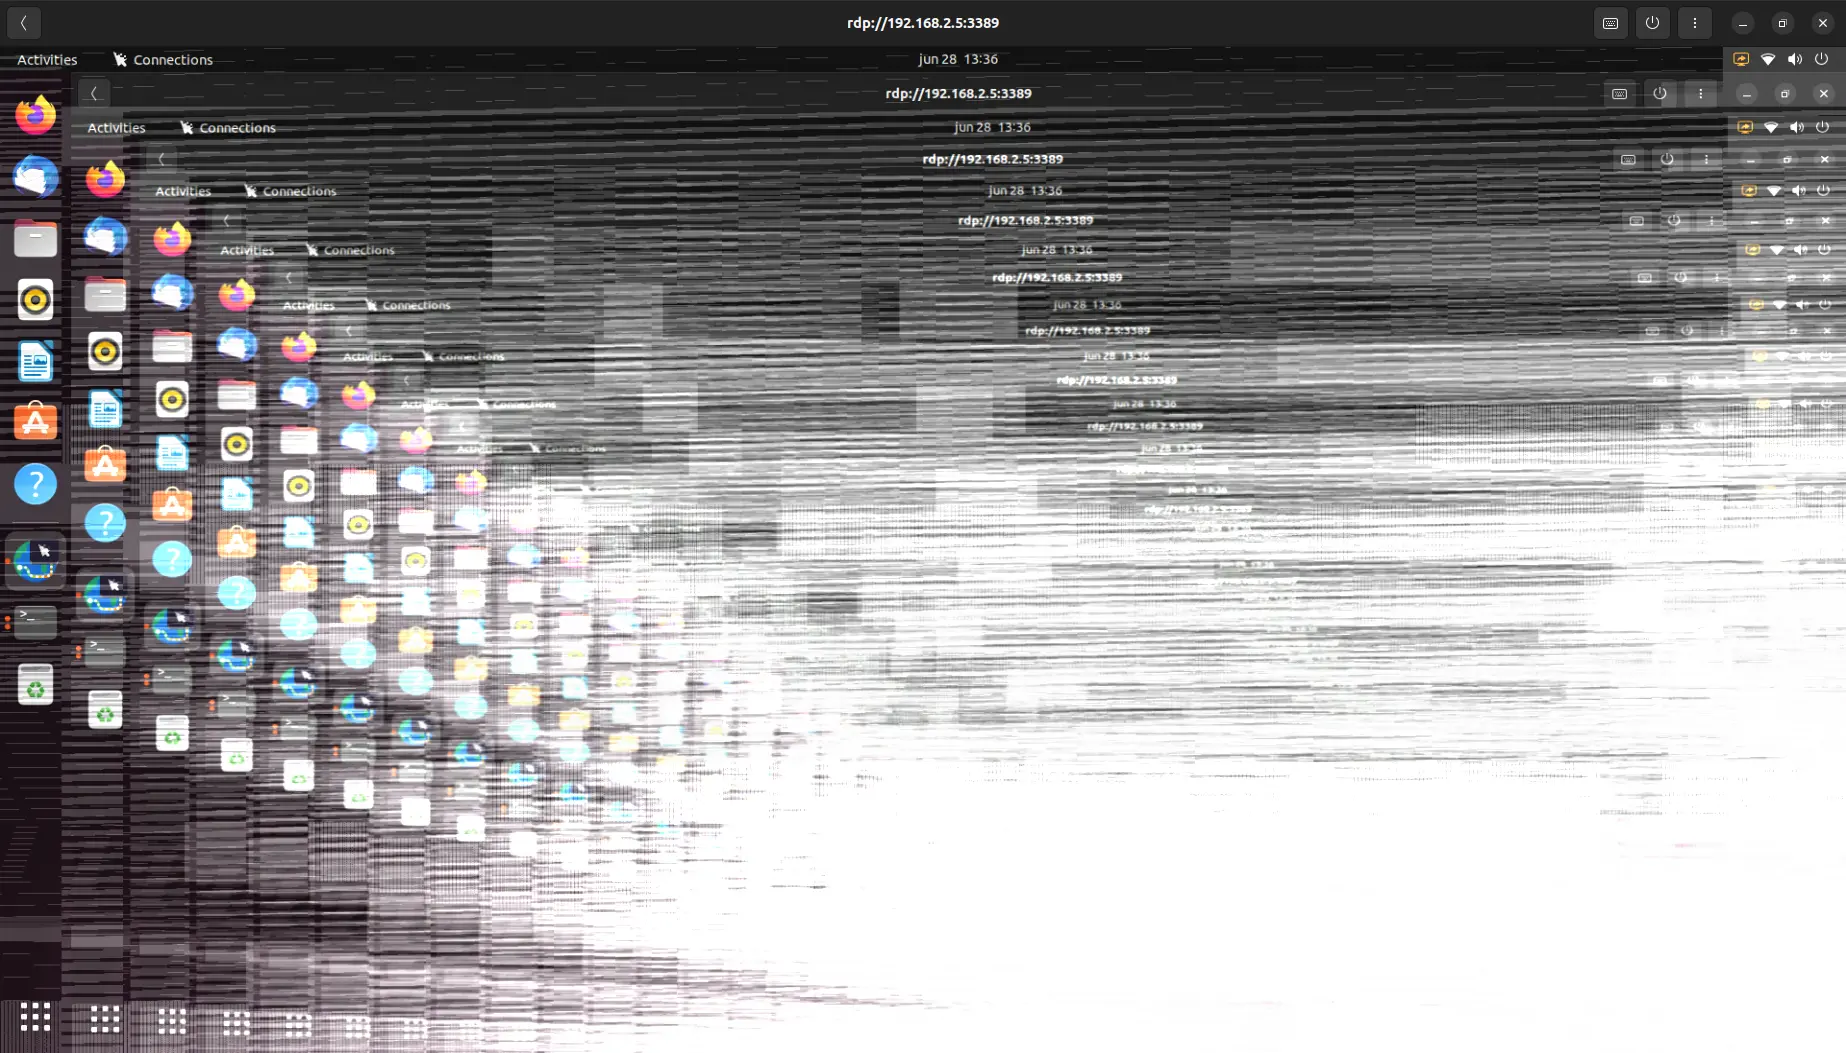
But the default resolution seems to be quite poor. And I could not find a scaling options, so you end up with a more spacey psychedelic form of computer art.

The Gnome-Connections Art

The Gnome-Connections Art

Cool as well.

Update: Actually there is a scale setting for Gnome-Connections, a bit hidden, under properties once you established a connection. Using Gnome-connections for managing my Pi400 from another Ubuntu 22.04 is working quite well, although I had to restart the Pi400 to get control working.

So maybe Gnome-connections is lacking a lot of settings, it’s working out of the box surprisingly well in Ubuntu 22.04.

Give it a try, if you own a Pi.

How does the Pi create a Droste effect?

You open up a program that shows your complete desktop scaled including the program that shows your desktop scaled, etc etc.

Actually I was expecting a crash, or out of memory error, you will probably get that when you let it run for hours, but the Raspberry Pi kept being responsive for the couple of minutes I tried. Enough time to take a screenshot.

So it seems Ubuntu and Gnome are much more optimized for running on less powerful hardware in 2022 then a couple of years ago.

This funny showcase of the Droste-effect is the prove, and that is all a big win.

Please let me know what you think in the comments.

No Comments

Using a Logitech G203 mouse under Linux

Friday, December 4th, 2020

Both the Logitech G203 Prodigy and the newer Logitech G203 Lightsync are affordable gaming mouses that have a normal size, a small lag, nice sensors, and also suitable for general use.

The mouse has six buttons, and by default the the fourth and fifth thumb buttons are defined as back and forward buttons, that come in hand browsing the web. I’m not sure what the sixth is by default, but it can easily set up to switch or cycle resolution.

But how to control the RGB lighting, the buttons and the resolution under Linux / Ubuntu?

Configuring the Logitech G203 mouse

You have to do the following to get the mouse working under Ubuntu 20.04:

Install the ratbagd system daemon to introspect and modify configurable mice:

sudo apt install ratbagd

Install the GUI Piper, that is available as flatpak:


flatpak install flathub org.freedesktop.Piper

The G203 Lightsync is a relative new mouse, the ID is still missing from the definitions shipped with ratbagd, so we have to add that manually.

To find the ID:

lsusb
Bus 003 Device 002: ID 046d:c092 Logitech, Inc. G203 LIGHTSYNC Gaming Mouse

Edit usr/share/libratbag/logitech-g102-g203.device


sudo vi usr/share/libratbag/logitech-g102-g203.device
DeviceMatch=usb:046d:c084;usb:046d:c092

Restart the ratbagd daemon:

sudo systemctl restart ratbagd.service 

Run Piper, and the GUI will start, so you can set resolution, buttons and RGB effects.

Configuring the Logitech G203 mouse under Ubuntu with Piper

Configuring the Logitech G203 mouse under Ubuntu with Piper

The proper SVG image is still missing though.

13 Comments

Fixing the iPhone CSS hover problem on iOS

Wednesday, November 6th, 2019

Mobile phones don’t have a mouse, your greasy fat touchy fingers have to do the job, they kinda act like a giant mouse.

There is major difference: a mouse can click, drag and  hover above the screen, while your fingers can click and swipe, but not hover. Well they can, but nothing is happening then. 🙂

The official terms here are: mouse-events, touch events, and pointer events, for both mouse and touch events. So touch events don’t know about hover, cause that is a mouse event.

So those nice old style CSS-only dropdown menu’s won’t work on your phone, because the depend on :hover.

Hover events work on mobile Android or Firefox browsers, as those browser vendors looked for compatibility, and made a click with your fingers act like hover on elements that are not a link. That is smart thinking, and good care for compatibility. Keep old sites working. Keep sites accessible without forcing Javascript.

But they don’t work on iPhone or mobile Safari, so we need a solution for that.

Plain HTML is and has always been responsive. It’s the CSS that destroyed it, by setting explicit width.  Well there was no max-width, so designers had not much choice. But remove all CSS and magically your HTML will be responsive, except for tables and large images, but at least you can scroll them into sight so everything is still accessible.

Pity the Apple people. An iPhone with mobile Safari doesn’t do :hover, breaking compatibility for old sites, and forcing webdevelopers to use `Javascript`  for these trivial things. Annoying.

There are examples on the internet how to fix that, like adding an onclick attribute to every element you want the :hover rule for, but that’s adding a lot of code, and the elements the don’t hide again when you click somewhere else.

We need better solutions!

How to make :hover  work on Safari iOS on iPhones and iPads.

Here are a few very simple options, that I came up with having a new iPhone 11 around for a couple of days. Tested on the latest iOS 13.
(more…)